
Utility Truck Graphics for Specialized Working Fleets
Utility trucks combine a commercial identity with compartments, access equipment and unusual body shapes. Plan graphics around the equipment that is actually fitted, keeping the operator's name clear while respecting the vehicle's functional surfaces and existing identification.
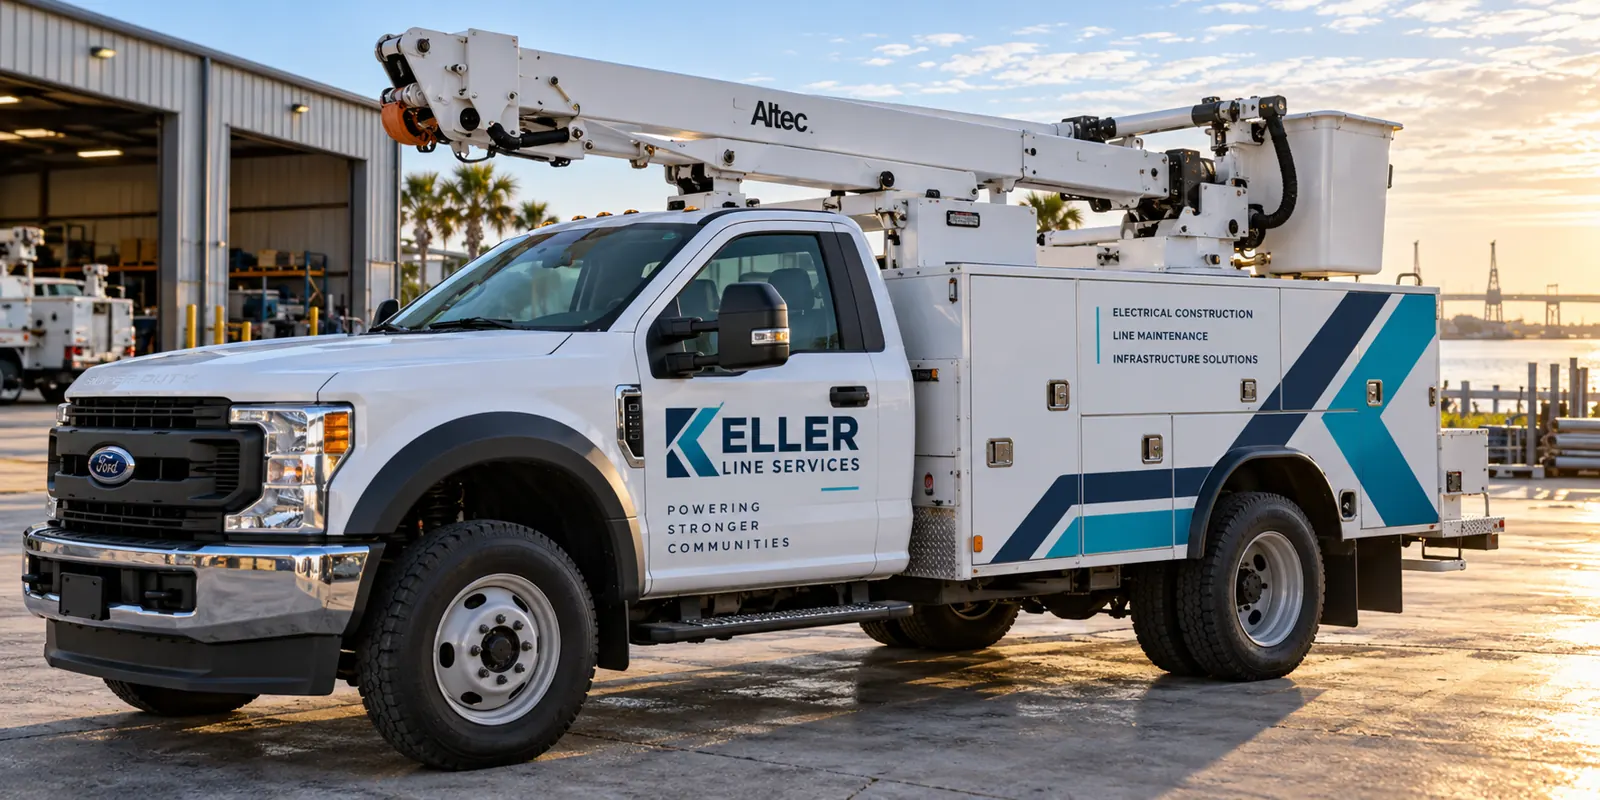
Fictional commercial wrap design concept; not a completed customer installation.
Identify the exact utility body before choosing coverage
A utility truck is not defined by the cab badge alone. Its service body, storage layout, boom equipment and work accessories determine the available graphic areas. Two trucks on the same chassis can need very different layouts. Start with current photographs and the body or equipment details you have, rather than a catalog image of a similar model.
Show the truck in its normal parked configuration with equipment safely stowed. Include both sides, front and rear, then photograph compartment doors, access panels, existing labels and any areas you want excluded. For general commercial vehicle choices, use the vehicle directory. This page focuses on utility equipment and its body-specific planning needs.
Keep the operator identity separate from functional information
Make the company name and service category recognizable on the most suitable stable panels. A concise message is easier to organize across a divided body than a long list of capabilities. If a customer should use a particular phone number or website, choose one primary route and review its placement carefully.
Record existing unit numbers, warnings, equipment labels and any other identification your organization requires. Mark the areas that must remain visible and usable. Supply verified wording from your own records and have the appropriate fleet or safety owner review the proof. A branding design should not invent technical labels or treat required information as decorative space to cover.
Work with compartments, handles and changing access positions
Utility bodies often divide a side view into many small panels. A large word can become difficult to read when several handles and gaps cut through it. Review the name across the actual compartment layout and consider whether a simpler arrangement on fewer panels communicates more clearly. The body should guide the design rather than be hidden by a generic truck illustration.
Explain which doors are opened frequently and where tools or equipment contact the surface. Include steps, reels, racks and fittings that interrupt access. If your project is primarily about the compartmented repair body rather than utility equipment, compare the service-body truck planning page for a narrower view of those layout decisions.
Choose branding coverage around the useful surfaces
Lettering can create a restrained identity while preserving the original body color. Partial graphics can connect the cab and service body without requiring every compartment to become part of one continuous image. Fuller coverage may be considered where the surfaces and project goals support it. Ask which panels are included instead of relying on a package name.
Do not assume that every equipment component is suitable for vinyl or part of the proposed work. Identify exclusions, moving parts and access concerns in the scope. Compare lettering and partial coverage using the same photographs and message. A useful proposal describes the actual areas being branded.
Build a mixed-utility fleet system with clear exceptions
List truck types and quantities separately. A boom truck, a pickup and a smaller service unit can share the same brand hierarchy while using different artwork versions. Define the position and treatment of the operator name, service description and unit information, then adapt that system to each body rather than forcing an identical composition.
Keep a vehicle list linked to the approved proofs. Record aftermarket bodies and equipment changes so later replacements do not use an outdated layout. The fleet solutions page connects the wider rollout decisions. Use it when the project includes several vehicle categories and the main challenge is consistency across the whole equipment list.
Disclose condition and coordinate vehicle availability
Photograph old vinyl, corrosion, damaged paint, repairs and residue. Describe any known body history that could affect the scope. Graphics should not be treated as a repair for a surface concern, and removal should not be assumed to be included automatically. Ask for preparation and exclusions to be recorded before approving the project.
Explain when the truck can be released and who will manage delivery, access and collection. Identify specialist equipment restrictions early. Do not alter or remove components simply to fit a guessed installation plan. Coordinate around the agreed scope and a confirmed schedule, with the responsible vehicle or equipment owner involved where access decisions require them.
Prepare a specific brief and preserve the future reference
Send the chassis and body specifications, quantity, current photos, brand files, essential wording and preferred coverage. Include existing identification that must be preserved and name the person who can approve it. Review each vehicle view and all contact details before authorizing production. Keep the dated proof with the unit identifier afterward.
Use the cost guide to compare complete scopes, then request a utility-truck graphics quote. The illustration shows a fictional private contractor identity, not a completed customer installation or a claim of affiliation with a utility. Your final layout should use your actual approved identity and equipment information.
Frequently Asked Questions
Turn Your Vehicle Details Into a Clear Project Brief
Send current photographs, vehicle quantities, logo files, coverage preferences and timing. Identify old graphics and paint concerns so the project review can address the actual equipment.
Explore planning resources or request your commercial wrap quote.